Sunday, September 22, 2013

Preventative Maintenance (Engine Room)

We are planning a small cruise from from Houston to Corpus Christi and in preparation for that, I was doing maintenance in the engine room prior to the trip.  This started with the simple stuff

  • Change Oil and Oil  Filter
  • Fill and Check Transmission fluid
  • Run the engine with a load to just validate everything is good to go for a trip
Timing was great, because I found my preferred oil on sale for $12.99 per gallon.  Since we have a 50 Horsepower Perkins 4-108 diesel, I like the heavy duty oil made for diesels.  Shell Rotella T is the brand I use.  Given it was on sale, I went ahead and picked up 2 gallons.  
I also keep a good supply of WIX oil filters for this engine on hand.  I bought a dozen of them 2 years ago.
One of the things I like about having an engine room (and not just a compartment the size of the engine) is the ability to store spare parts and have a little bit of room to work when needed.   I keep a small wire shelf on the rear wall of the engine room that has spare parts and required tools close at hand at all times. 

This is certainly not a complete supply of all of our spares and parts, but these are some of the things I like to keep very handy and nearby the area they will be needed.  The top shelf (not shown in this picture) contains 3 different funnels; small oil funnel, large funnel with flexible hose and a diesel filtering funnel.  

Maintenance supplies in Engine Room
The next shelf down has a small battery tester (you can see the red bulb on the syringe.  It is a glass tube that can determine the quality of each cell of a lead acid flooded battery.
To the right of that is a kitchen spatula that stays in the engine room.  It is used to clean the inside of the site glass of our water strainers (Engine, Air conditioner, shower, etc)  To the right of that is a spare Fuel lift pump in the event we ever need to replace it.   The WIX box is the oil filter and I always keep 2 on the shelf.  You will notice there is only 1 here as I just used one today and have not put the other spare on the shelf.  I also store 2 plastic bags (to the left of the fuel pump) these can be used in a pinch to capture all of the oil when removing the filter and keep any from going into the bilge (See attached video for explanation).  To the right of the filter behind the exhaust riser, there is also an oil filter wrench.

The next shelf down contains two diesel fuel filters and o-rings.  Additionally I have my antifreeze tester there as well.  For those who are really observant and want to know why there is a shot glass also on that shelf, I would love to give you a cute little answer about needing a shot each time I work on the engine, but actually we put a dollop of Kanberra Gel in that about once a month to help keep odors down in the engine room.  

One of the great things that the Previous Owner (PO) has done on this boat is install a permanently mounted oil removal pump.  To "draining" the oil is as easy as running the engine to temperature so that the oil is nice and warm, then opening the oil fill cap, and putting the end of the small hose in a gallon jug and pushing the button.  That's it.  This little pump will pump all of the oil from the drain pan into the jug.   Great little tool and one of my favorite "makes life easier" tools.  Once empty, I changed the oil filter as well.  I have to thank Mike O'Barr for showing me this great little trick for removing the oil filter and keeping oil out of the bilge.  He showed me this on my last boat, and I certainly have carried it forward on this one.  I fold up a few paper towels, or a "puppy pad" under neath the oil filter. I then use the oil filter wrench and loosen up the filter until I can turn it by hand.  Then I take a 1 gallon zip lock back and slide it over the filter and the filter housing, holding the opening of the bag as high as possible.  Then it is just a matter of spinning the filter off it's post.  The oil drips in the bag, once off, I pick up the paper towels underneath and wipe off any oil sitting on the filter housing and drop them into the ziplock.  Zip it up and viola, the oil, filter and oily towels are all in that nice little package.  

I then topped off the transmission fluid.  I have a Borg Warner Velvet Drive transmission in this boat and it can use just about any transmission fluid that meets the Perkins standards (which are most of them).  

I also took the time to treat the water in the holding tanks and install new cartridges in the whole boat water filtration system we built earlier this year.  I added a sediment filter (5 micron) as well as a 1 micron Coconut shell carbon block filter.   The first stage removes any debris, sand, dirt, etc that may be in the water, the next one, removes any chlorine, bleach or other chemicals that may give the water an undesirable taste.  


Sunday, August 25, 2013

The work moves to the V-Berth

Our plan of starting our refit inside the boat from the rear and moving forward has worked pretty well.  We are now to the V-Berth which is a pretty good sign.  This is an area that will require quite a bit of work due to leaks that were in the large opening hatch on the coachroof.  Like most things, you don't quite see how bad it is until you take out all of the molding and really start looking closely at things.

We have removed the headliner from the coachroof, and removed all of the molding carefully labeling it all with a sharpie so we can put the puzzle back together.  Sadly I broke a piece of the molding, but as this project has gone on, I have been getting better at correcting my mistakes.  One of the things we learned how to do was  make our own molding to match what is on the boat.  It takes some time and creativity but we have been able to replace it all and keep making them out of solid Teak.

Dry fitting curved Mahogany wall in place (lots of work to still be done)
We removed the opening port, cleaned all of the old bedding material off of the fiberglass both inside and out.  We removed every bit of sealant and bedding from the port as well as the decorative trim that goes on the outside.

We have made new decorative wall sections out of Mahogany plywood like it was originally.  This will cover the raw fiberglass on the inside of the coachroof.  We put a thin layer of insulation behind each panel and then start the re-assembly.  This particular piece was a bit interesting because it is curved.  We have certainly dealt with curves before but this one is not as wide so the curve it a bit tighter.

The picture is just the first step where we have just dry fit the curved piece in place.  The next step will be to bed the port later today and install the other 2 sides of the mahogany walls.

We have been putting the work in the V-berth off since we moved aboard, but we are expecting some friends to visit in a month or so and want to be sure that this room is ready for them when they arrive.

Frankly, the toughest part of this V-Berth work is going to be the fact that the forward bulkhead is rotted and is going to have to be replaced.  It's purpose is to essentially store the anchor chain and rode.  For those not familiar with it, when pulling in the anchor, the chain or line goes through an opening called a hawse-pipe and drops into this forward compartment.  It allows the topsides to stay neat and not have to find a place up there to store 200-300 feet of chain.

Sunday, August 18, 2013

Getting the most from your Provisions


As you likely know from reading this blog, we tend to blog about projects and things we are doing or refitting on the boat.  The thing is now that we have moved aboard, we don’ just work on it every waking hour (though at times it seems like it). 

This morning before the heat of the day, I was relaxing in the cockpit and decided to do some food preparation for the upcoming week.  Deb and I had made a roasted chicken for dinner earlier in the week.  We had wrapped it up and put it in the fridge.    While living in our house, we would have left it in the fridge and either heated up a bit or tossed it in the trash when it had been in there a “little too long”. 

Rather than do that, we decided to prep all of the chicken for use in other things this week. 
First I stripped all of the skin from the bird (there was still a whole bird short of one breast and one wing).  The next steps was to remove the chicken from the bones.  Breaking off each piece (Breast, thigh, wing, leg) I just pulled the chicken from the bones being careful not to get any of the cartridge from the joints.  Each piece of chicken was pulled into a small ¼” to ½” wide strip of meat.


 All of that went into a Ziploc baggie to be used late.  We can make chicken sandwiches, chicken soup, or even to be seasoned up and rolled into a tortilla for a quick lunch/dinner.   This would be a great meal to do quickly and easily while under way.

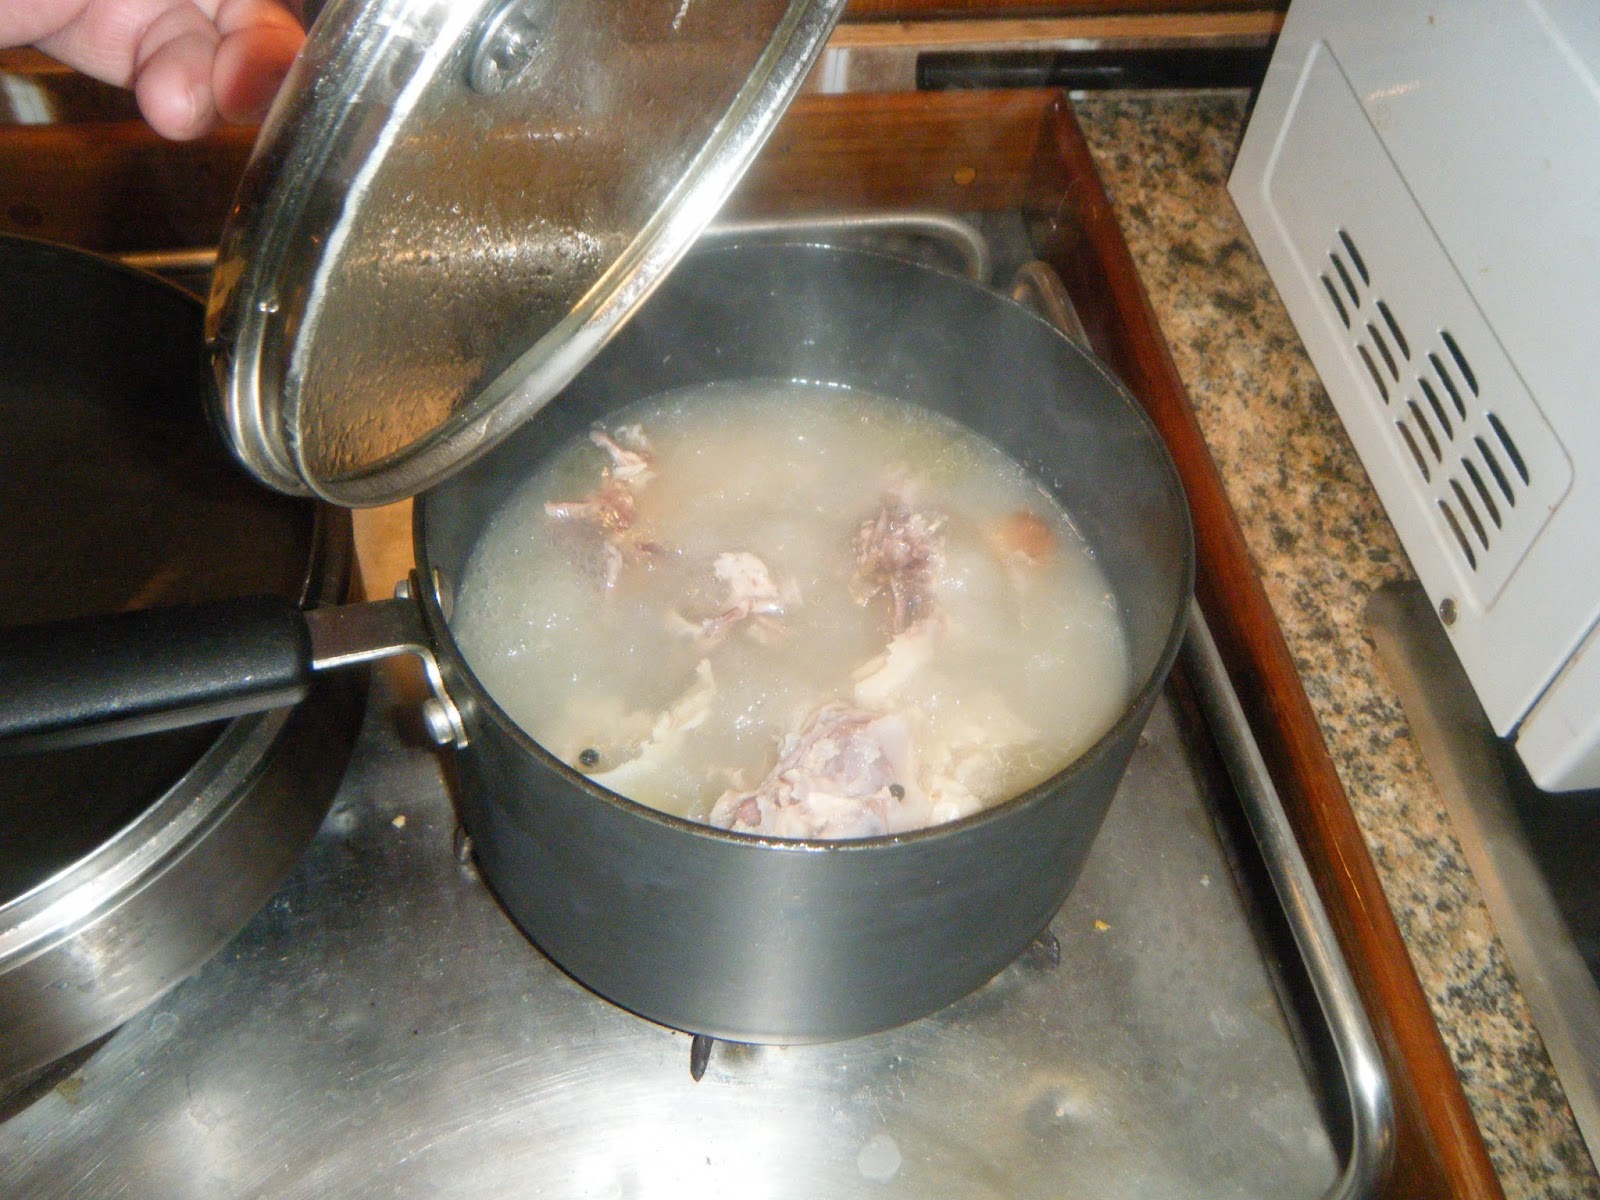
To make sure we get the most use out of this, we also broke the carcass into two parts and put it in a pot of water along with the chicken leg and thighbones.  We added, salt, pepper and just a bit of cayenne and heated it up on the stove.

 This will then be strained and cooled, when cool, we will scrape any fat off the top of the stock and put it in a sealed container to use as chicken stock in rice or soup later in the week.

I know this is a departure from our typical blog, but hope that over time these become more about what we are doing and where we are going than just what we are rebuilding J

Until next time, we will be enjoying our upcoming meals.

Bones simmering to make Chicken Stock


May the wind fill your sails, and your keel stay down.

Saturday, August 10, 2013

Maintaining the Water strainers - How to and what not to do

I have been saying for about 2 weeks that I need to clean the water strainer.  We used to clean them about every 4-6 weeks.  When we moved aboard, the air conditioners were running much more often than when we were not, meaning these filters were seeing a lot more circulation than ever before.  I suspect in the 5 weeks or so since we have been living on board, we likely ran as much water through the air conditioners as we had the entire previous year of just weekend use.

I had been putting it off knowing it was going to be a bit of a nasty job.  Today I decided that since I was going to do it, I would make a video of how to maintain them.  In this video I go through the steps to clean them, however waiting this long is an example of what not to do.  I can already tell that the flow is not back to what it was a month ago, which means I am going to have to flush all of the lines.  This is not going to be a simple job unfortunately.  I will likely buy a flushing kit that has a way to ensure you can put in a solution to all of the lines to break down all of that nasty growth that will be in there.

I have always had some goopy silt that gets in the water strainer in this location but this time it really felt like the texture of a jelly fish or congealed fat in the strainer bowl.

Well here is a video of how to clean it, but this stuff was pretty nasty.


Saturday, July 27, 2013

Lets all do the Organization Shuffle ...


Even after paring down a lot of our belongings that we had in our apartment and separating into "things to take to the boat" and the "get rid of" piles, we still had a LOT of things we were thinking we would be taking to the boat.  We started to get nervous, but each load we took to the boat found a home and we were starting to feel pretty good about the amount of storage the boat really has.  We still have behind the settee's we can fill up, but I still have a slight leak where the Chain Plate comes trough the deck.  It is never a lot of water and if I put a wash cloth there, it tends to dry before the next bit comes on board, but if we were taking green water over the deck for days at a time, it would e an issue.  So…  I need to mix up some epoxy with a bit of filler and will fillet it along that seam.  The moral of that story is that I think we still have another bunch of storage area that we will be able to use there as well when I fix that leak.

We certainly want to be comfortable where we sleep and installed a memory foam mattress (12" thick) in the owners stateroom.  It is almost too thick.  I have raised up and bumped my head before on the ceiling under the aft deck :)

Given this is an older boat (1978), it was before all the manufacturers started looking at putting center line queen berths in the boat.  So this one is the traditional U shape, wider forward than aft with a removable section to convert it all to bed.  We decided to set this up so it will be our permanent bunk and wanted it comfortable.  The problem was that the bunk fore to aft is about 4" inches shorter than a king sized bed.  At the aft end of the bed, it is about 8" narrower than a king sized bed, and at the forward section, where our feet would go, it is actually about 9" wider than a king sized mattress.  Knowing that we could sleep comfortably with something narrower than the king, we cut our memory foam mattress (all 4 layers of it) to fit tightly in the aft end of the bed (where our heads go) and then we sleep at an angle with our feet toward the Starboard forward part of the bunk.
This opened up 26 inches of available space on the port forward side of the bunk which in the long run we will likely build storage and drawers for a nice permanent solution for storing clothes, etc.  Before building it, we bought some cheap plastic drawers and a frame to sit in that spot so we can see how well it works for keeping things there.  The 24" of height of the drawers makes it perfect to keep the satellite/cable receiver on and just below where the TV is mounted in the rear stateroom.

You can see from the pictures a bit of the open and available space on one side of the bunk.  Right now, it just drops down off the side of the mattress, but we will get creative on what we build here.   Whatever it is we will have to make sure it still allows access to all of the openings below to access the steering quadrant, steering cable and pulleys and air conditioning duct work.

We also started to bring the clothes we will need on a regular basis.  We gave SO much away, I am still shocked how much we still have.   Really, I gave over 20 shirts, 12 pants, 9 pair of shoes, boots, etc.  It is crazy how much stuff we acquire through our lifetime.  I had 2 pair of cowboy boots that I just don't see being worn and used on the boat…Gone.

We converted the hanging locker in the rear stateroom to a series of shelves to store folded clothes on.  We will still have the hanging locker in the walkthrough and across from the forward head.  I suspect that we will be replacing the rear air conditioner unit that was mounted right in the middle of a hanging locker rendering it completely useless for any storage, so I am fairly certain we will install that somewhere else and will get that locker back as well.

My biggest clothing challenge that I still haven't come up with a great solution for yet, is my suitcase.  I travel for work a lot, and normally at home, I would pack my suitcase the day before a business trip and off I would go.  Even a small carry-on roller bag is pretty big to have on board, so right now I am keeping it in my car and taking my clothes to it in a bag that I then transfer in the car as I leave for my trip.  There may be a better way, but so far, I haven't figured it out .

Lastly, we decided to move the fan in the rear stateroom to a location that may get a bit more circulation.  I tapped into the 12volt power at my light fixture and mounted the fan right near the ceiling aiming at the bed.   One of these days I will write a blog on how you can take a fixture you like from the hardware store designed for 110v household wiring, add a switch and convert it to a DC fixture to run on the boats 12v system.  I have also converted some of these fixtures to LED lights as well to reduce the amperage they use.  The one in the picture below is not LED but is 12v DC.  Being Texans we really like the single star on these lights.


Saturday, July 6, 2013

Moved aboard !!!

It has certainly been a long time coming.  We had bought the boat just over 2 years ago.  We originally planned to take a year or so to refit it and move aboard.   We found out the true meaning of "Boat=Bring out another thousand" as we found more and more things that made sense to repair or replace while we had things torn up.  The 1 year plan turned into 2, but with our lease up at the end of July where we live, we confirmed with our landlord that we would not be renewing and that put the deadline firmly in place.

That lease is up at the end of July.  We intended to be on the boat by the end of June in the event we needed that bit of a time cushion.  We made it... for the most part.   I keep hearing how cruisers have to adapt to changing plans and not tie themselves to deadlines so I am ok with "for the most part".

To add a little more detail, we have been sleeping on the boat since the 30th of June with the exception of July 3rd when I had a problem with power and there was no 110v and no air conditioning.  Since we still had the apartment, we decided to sleep there that night and I would look at the problem the next day.

Bottom line is we are still working on finding homes for all of our stuff on the boat.  We have, for the most part, setup the major electronics for comfort and pleasure while living aboard (internet, TVs, wifi, and laptops and of course have all of the marine electronics as well)

So here I sit at the Nav station writing my first blog as a live aboard.  I am reflecting back to 2 years ago.  Deb and I had bought the boat, and with a few of our experienced sailing friends not being able to make the trip from Florida to Texas with us, we decided to give it a shot on our own.  So 2 years ago today (on July 5th) we had pulled out of Houma, LA on the Inter-coastal waterway, heading west through what can only be described as something you would see on that show "Swamp People"   It was beautiful and gave us a taste of what it would be like one day living and traveling on the boat.

Salon - Port Side forward (DURING) I can't find a true before
So far so good, This is the first day, that Deb and I have been down on the boat and just relaxing or chilling out in almost 2 years.  We heard some loud booms outside and realized that there was a big ole firework display over the water in Kemah.  We walked to the end of our dock where there were another 6 or 7 live-aboards sitting on dock boxes and enjoying the show.  It was a good time and relaxing :)

 We thought we would show a picture of what it looked like the first day we actually moved aboard.  We knew that as soon as the last coat of varnish was dry, we would be ready to move on.  Each coat we added, we kept hoping "Maybe this will be the last coat"   But... Deb and I like to have a really thick rich coat of varnish so the wood looks like it is almost encased in glass.

Salon - Port Side forward (AFTER)
So, this time it took about 7 coats to get to that point.   You can see the difference with the before and after shot of the same area.   We still have to add the door catches to the teak salon cabinets, but we sure like the way they came out.  They are all solid teak frames for the cabinet and doors.  The door inserts are 1/4" teak plywood that has been sanded, sealed and varnished.

At some point in the next year or so (low on the priority list right now) we will end up recovering all of the cushions in a nice plush white leather like material that is soft but can be cleaned and withstand the environment.

All in all it has been a crazy, busy, educational, fun and frustrating time to get to this point.  I wouldn't trade it for the world because I am excited about what the future holds for us.


Below is a 360 degree view of the salon from the bottom of the companion way stairs.  If you drag the picture right and left you can do a full circular view as if you were standing in that spot.

Saturday, June 29, 2013

Continuing to complete the little tasks...

It seems that the major tasks that needed to be done before moving onto the boat are done.  There are a lot of little ones and today was one of those days filled with little tasks.  Deb was taking care of some final prep on storage areas before putting pots, pans, food, and storage bins in all of the little hidey holes that will become our the equivalent to a house "pantry"
Here is some video of Deb doing the work on this task.  She actually does a LOT of the work on the boat and helps with most projects but sadly she is usually the one filming so you rarely see her 'doing' the work.

In addition to this today, we were also able to get a third coat of varnish on all of the new teak cabinets
in the Salon.  In the picture to the right, you can see that we still have all of the cushions out of the salon so we don't get any varnish on them.
Salon starting to come together
With those missing, it seems so disheveled.  Today, I was also doing some work under the companion way steps, so you see those leaned up against the mast in this photo.  The cabinet doors are all inside getting varnished as well and I am hoping by early next week they will all be installed.

Things Deb completed today.

  • Loaded pots and pans for the boat
  • Organized several air tight containers (Lock & Lock are the brand we really like) in the pantry behind the stove. 
  • Started to put some condiments into the refrigerator (Ketchup, mayo, salad dressings, etc)
  • Finished organizing all of the screws from our projects (which we had in about 40 small plastic cups)  She sorted and tossed any flat head screws, and kept all bronze and stainless screws.  We threw away all zinc ones due to the possibility of corroding on the boat in the salt air.  
Things I was able to complete today.
  • Installed House Battery (Big ass 8D battery) into the new battery box with tie downs in the engine room (With a stroke of genius, I was able to use the companion way stairs and a couple of dowels to roll the battery from the walkthrough up onto the new shelves in the engine room without having to lift the 75lb battery while contorting my body in the engine room)
  • Rerouted the large battery cables for the starting battery, house battery and both charging banks
  • Cleaned and services both batteries
  • Installed molding under rear stateroom door frame and around shower
  • Put engine room door back on as well as forward engine access panel that has been out for months
  • Another coat of varnish on the cabinet doors (insides this time)