Showing posts with label Cruise. Show all posts

Sunday, September 22, 2013

Preventative Maintenance (Engine Room)

We are planning a small cruise from from Houston to Corpus Christi and in preparation for that, I was doing maintenance in the engine room prior to the trip.  This started with the simple stuff

  • Change Oil and Oil  Filter
  • Fill and Check Transmission fluid
  • Run the engine with a load to just validate everything is good to go for a trip
Timing was great, because I found my preferred oil on sale for $12.99 per gallon.  Since we have a 50 Horsepower Perkins 4-108 diesel, I like the heavy duty oil made for diesels.  Shell Rotella T is the brand I use.  Given it was on sale, I went ahead and picked up 2 gallons.  
I also keep a good supply of WIX oil filters for this engine on hand.  I bought a dozen of them 2 years ago.
One of the things I like about having an engine room (and not just a compartment the size of the engine) is the ability to store spare parts and have a little bit of room to work when needed.   I keep a small wire shelf on the rear wall of the engine room that has spare parts and required tools close at hand at all times. 

This is certainly not a complete supply of all of our spares and parts, but these are some of the things I like to keep very handy and nearby the area they will be needed.  The top shelf (not shown in this picture) contains 3 different funnels; small oil funnel, large funnel with flexible hose and a diesel filtering funnel.  

Maintenance supplies in Engine Room
The next shelf down has a small battery tester (you can see the red bulb on the syringe.  It is a glass tube that can determine the quality of each cell of a lead acid flooded battery.
To the right of that is a kitchen spatula that stays in the engine room.  It is used to clean the inside of the site glass of our water strainers (Engine, Air conditioner, shower, etc)  To the right of that is a spare Fuel lift pump in the event we ever need to replace it.   The WIX box is the oil filter and I always keep 2 on the shelf.  You will notice there is only 1 here as I just used one today and have not put the other spare on the shelf.  I also store 2 plastic bags (to the left of the fuel pump) these can be used in a pinch to capture all of the oil when removing the filter and keep any from going into the bilge (See attached video for explanation).  To the right of the filter behind the exhaust riser, there is also an oil filter wrench.

The next shelf down contains two diesel fuel filters and o-rings.  Additionally I have my antifreeze tester there as well.  For those who are really observant and want to know why there is a shot glass also on that shelf, I would love to give you a cute little answer about needing a shot each time I work on the engine, but actually we put a dollop of Kanberra Gel in that about once a month to help keep odors down in the engine room.  

One of the great things that the Previous Owner (PO) has done on this boat is install a permanently mounted oil removal pump.  To "draining" the oil is as easy as running the engine to temperature so that the oil is nice and warm, then opening the oil fill cap, and putting the end of the small hose in a gallon jug and pushing the button.  That's it.  This little pump will pump all of the oil from the drain pan into the jug.   Great little tool and one of my favorite "makes life easier" tools.  Once empty, I changed the oil filter as well.  I have to thank Mike O'Barr for showing me this great little trick for removing the oil filter and keeping oil out of the bilge.  He showed me this on my last boat, and I certainly have carried it forward on this one.  I fold up a few paper towels, or a "puppy pad" under neath the oil filter. I then use the oil filter wrench and loosen up the filter until I can turn it by hand.  Then I take a 1 gallon zip lock back and slide it over the filter and the filter housing, holding the opening of the bag as high as possible.  Then it is just a matter of spinning the filter off it's post.  The oil drips in the bag, once off, I pick up the paper towels underneath and wipe off any oil sitting on the filter housing and drop them into the ziplock.  Zip it up and viola, the oil, filter and oily towels are all in that nice little package.  

I then topped off the transmission fluid.  I have a Borg Warner Velvet Drive transmission in this boat and it can use just about any transmission fluid that meets the Perkins standards (which are most of them).  

I also took the time to treat the water in the holding tanks and install new cartridges in the whole boat water filtration system we built earlier this year.  I added a sediment filter (5 micron) as well as a 1 micron Coconut shell carbon block filter.   The first stage removes any debris, sand, dirt, etc that may be in the water, the next one, removes any chlorine, bleach or other chemicals that may give the water an undesirable taste.  


Sunday, August 18, 2013

Getting the most from your Provisions


As you likely know from reading this blog, we tend to blog about projects and things we are doing or refitting on the boat.  The thing is now that we have moved aboard, we don’ just work on it every waking hour (though at times it seems like it). 

This morning before the heat of the day, I was relaxing in the cockpit and decided to do some food preparation for the upcoming week.  Deb and I had made a roasted chicken for dinner earlier in the week.  We had wrapped it up and put it in the fridge.    While living in our house, we would have left it in the fridge and either heated up a bit or tossed it in the trash when it had been in there a “little too long”. 

Rather than do that, we decided to prep all of the chicken for use in other things this week. 
First I stripped all of the skin from the bird (there was still a whole bird short of one breast and one wing).  The next steps was to remove the chicken from the bones.  Breaking off each piece (Breast, thigh, wing, leg) I just pulled the chicken from the bones being careful not to get any of the cartridge from the joints.  Each piece of chicken was pulled into a small ¼” to ½” wide strip of meat.


 All of that went into a Ziploc baggie to be used late.  We can make chicken sandwiches, chicken soup, or even to be seasoned up and rolled into a tortilla for a quick lunch/dinner.   This would be a great meal to do quickly and easily while under way.

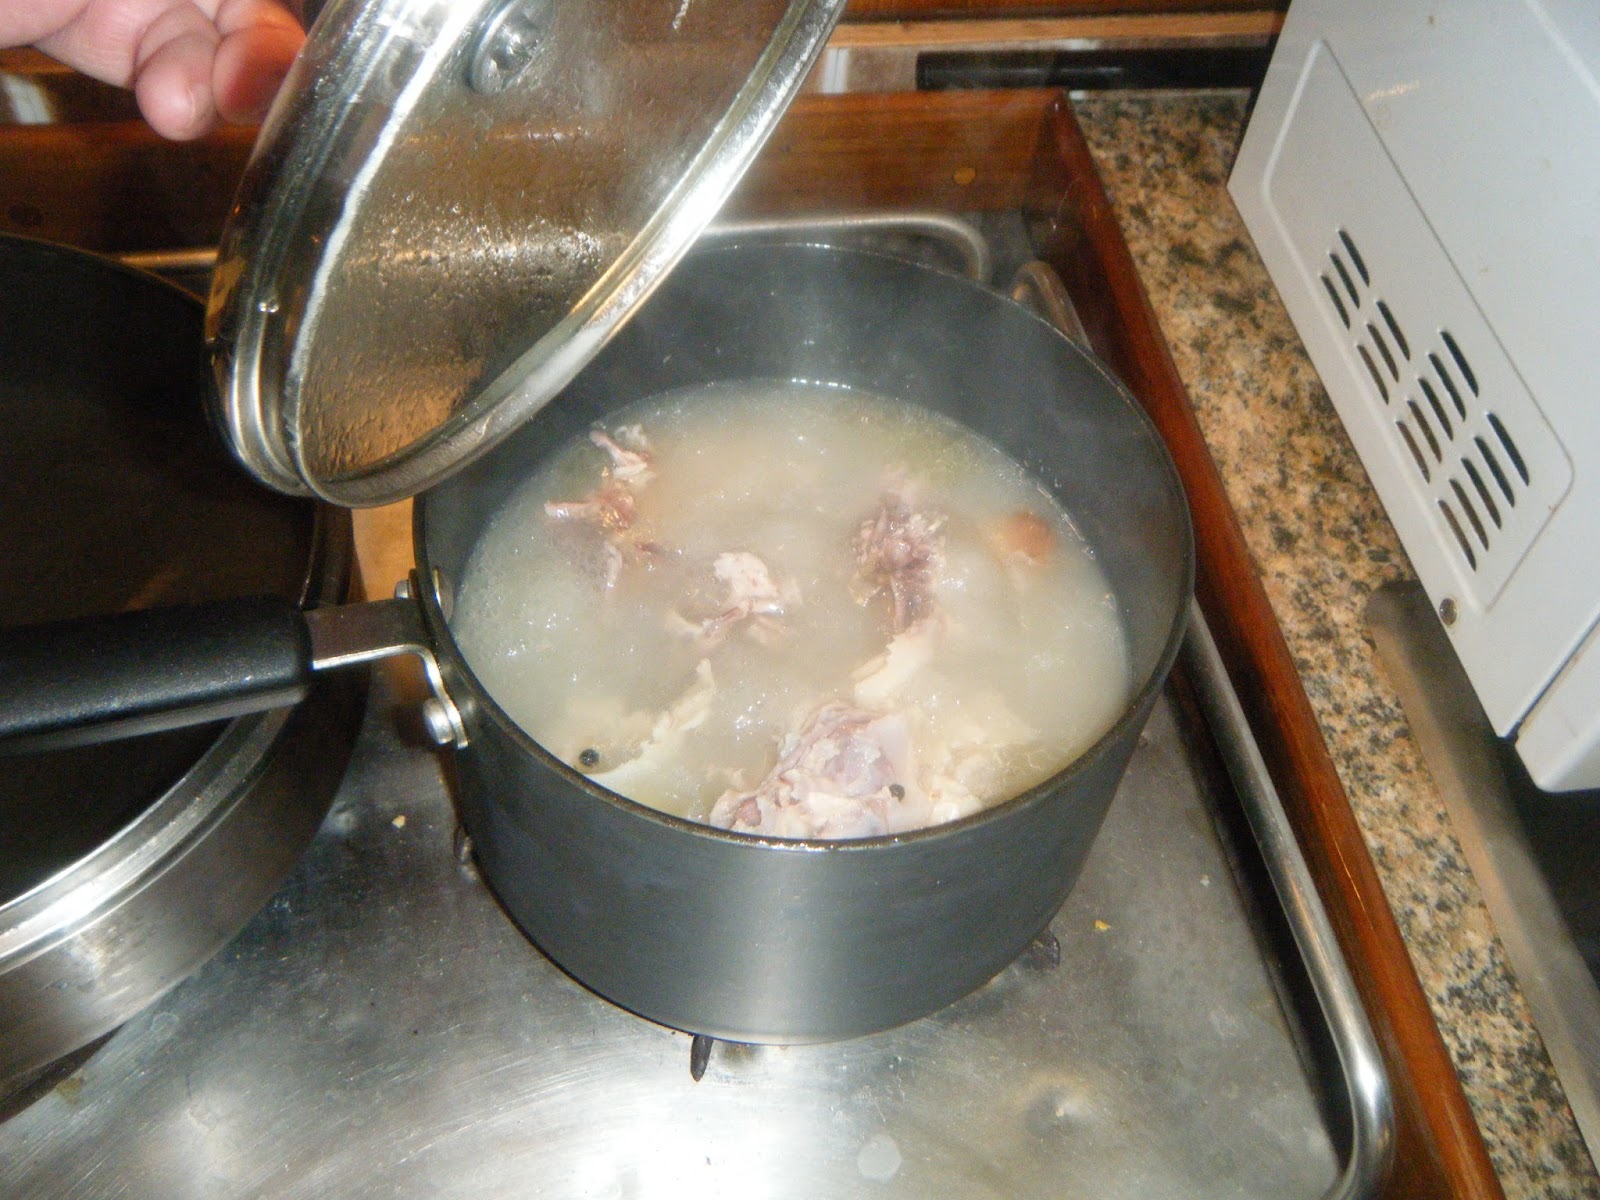
To make sure we get the most use out of this, we also broke the carcass into two parts and put it in a pot of water along with the chicken leg and thighbones.  We added, salt, pepper and just a bit of cayenne and heated it up on the stove.

 This will then be strained and cooled, when cool, we will scrape any fat off the top of the stock and put it in a sealed container to use as chicken stock in rice or soup later in the week.

I know this is a departure from our typical blog, but hope that over time these become more about what we are doing and where we are going than just what we are rebuilding J. 

Until next time, we will be enjoying our upcoming meals.

Bones simmering to make Chicken Stock


May the wind fill your sails, and your keel stay down.

Saturday, August 10, 2013

Maintaining the Water strainers - How to and what not to do

I have been saying for about 2 weeks that I need to clean the water strainer.  We used to clean them about every 4-6 weeks.  When we moved aboard, the air conditioners were running much more often than when we were not, meaning these filters were seeing a lot more circulation than ever before.  I suspect in the 5 weeks or so since we have been living on board, we likely ran as much water through the air conditioners as we had the entire previous year of just weekend use.

I had been putting it off knowing it was going to be a bit of a nasty job.  Today I decided that since I was going to do it, I would make a video of how to maintain them.  In this video I go through the steps to clean them, however waiting this long is an example of what not to do.  I can already tell that the flow is not back to what it was a month ago, which means I am going to have to flush all of the lines.  This is not going to be a simple job unfortunately.  I will likely buy a flushing kit that has a way to ensure you can put in a solution to all of the lines to break down all of that nasty growth that will be in there.

I have always had some goopy silt that gets in the water strainer in this location but this time it really felt like the texture of a jelly fish or congealed fat in the strainer bowl.

Well here is a video of how to clean it, but this stuff was pretty nasty.


Saturday, July 6, 2013

Moved aboard !!!

It has certainly been a long time coming.  We had bought the boat just over 2 years ago.  We originally planned to take a year or so to refit it and move aboard.   We found out the true meaning of "Boat=Bring out another thousand" as we found more and more things that made sense to repair or replace while we had things torn up.  The 1 year plan turned into 2, but with our lease up at the end of July where we live, we confirmed with our landlord that we would not be renewing and that put the deadline firmly in place.

That lease is up at the end of July.  We intended to be on the boat by the end of June in the event we needed that bit of a time cushion.  We made it... for the most part.   I keep hearing how cruisers have to adapt to changing plans and not tie themselves to deadlines so I am ok with "for the most part".

To add a little more detail, we have been sleeping on the boat since the 30th of June with the exception of July 3rd when I had a problem with power and there was no 110v and no air conditioning.  Since we still had the apartment, we decided to sleep there that night and I would look at the problem the next day.

Bottom line is we are still working on finding homes for all of our stuff on the boat.  We have, for the most part, setup the major electronics for comfort and pleasure while living aboard (internet, TVs, wifi, and laptops and of course have all of the marine electronics as well)

So here I sit at the Nav station writing my first blog as a live aboard.  I am reflecting back to 2 years ago.  Deb and I had bought the boat, and with a few of our experienced sailing friends not being able to make the trip from Florida to Texas with us, we decided to give it a shot on our own.  So 2 years ago today (on July 5th) we had pulled out of Houma, LA on the Inter-coastal waterway, heading west through what can only be described as something you would see on that show "Swamp People"   It was beautiful and gave us a taste of what it would be like one day living and traveling on the boat.

Salon - Port Side forward (DURING) I can't find a true before
So far so good, This is the first day, that Deb and I have been down on the boat and just relaxing or chilling out in almost 2 years.  We heard some loud booms outside and realized that there was a big ole firework display over the water in Kemah.  We walked to the end of our dock where there were another 6 or 7 live-aboards sitting on dock boxes and enjoying the show.  It was a good time and relaxing :)

 We thought we would show a picture of what it looked like the first day we actually moved aboard.  We knew that as soon as the last coat of varnish was dry, we would be ready to move on.  Each coat we added, we kept hoping "Maybe this will be the last coat"   But... Deb and I like to have a really thick rich coat of varnish so the wood looks like it is almost encased in glass.

Salon - Port Side forward (AFTER)
So, this time it took about 7 coats to get to that point.   You can see the difference with the before and after shot of the same area.   We still have to add the door catches to the teak salon cabinets, but we sure like the way they came out.  They are all solid teak frames for the cabinet and doors.  The door inserts are 1/4" teak plywood that has been sanded, sealed and varnished.

At some point in the next year or so (low on the priority list right now) we will end up recovering all of the cushions in a nice plush white leather like material that is soft but can be cleaned and withstand the environment.

All in all it has been a crazy, busy, educational, fun and frustrating time to get to this point.  I wouldn't trade it for the world because I am excited about what the future holds for us.


Below is a 360 degree view of the salon from the bottom of the companion way stairs.  If you drag the picture right and left you can do a full circular view as if you were standing in that spot.

Saturday, June 29, 2013

Continuing to complete the little tasks...

It seems that the major tasks that needed to be done before moving onto the boat are done.  There are a lot of little ones and today was one of those days filled with little tasks.  Deb was taking care of some final prep on storage areas before putting pots, pans, food, and storage bins in all of the little hidey holes that will become our the equivalent to a house "pantry"
Here is some video of Deb doing the work on this task.  She actually does a LOT of the work on the boat and helps with most projects but sadly she is usually the one filming so you rarely see her 'doing' the work.

In addition to this today, we were also able to get a third coat of varnish on all of the new teak cabinets
in the Salon.  In the picture to the right, you can see that we still have all of the cushions out of the salon so we don't get any varnish on them.
Salon starting to come together
With those missing, it seems so disheveled.  Today, I was also doing some work under the companion way steps, so you see those leaned up against the mast in this photo.  The cabinet doors are all inside getting varnished as well and I am hoping by early next week they will all be installed.

Things Deb completed today.

  • Loaded pots and pans for the boat
  • Organized several air tight containers (Lock & Lock are the brand we really like) in the pantry behind the stove. 
  • Started to put some condiments into the refrigerator (Ketchup, mayo, salad dressings, etc)
  • Finished organizing all of the screws from our projects (which we had in about 40 small plastic cups)  She sorted and tossed any flat head screws, and kept all bronze and stainless screws.  We threw away all zinc ones due to the possibility of corroding on the boat in the salt air.  
Things I was able to complete today.
  • Installed House Battery (Big ass 8D battery) into the new battery box with tie downs in the engine room (With a stroke of genius, I was able to use the companion way stairs and a couple of dowels to roll the battery from the walkthrough up onto the new shelves in the engine room without having to lift the 75lb battery while contorting my body in the engine room)
  • Rerouted the large battery cables for the starting battery, house battery and both charging banks
  • Cleaned and services both batteries
  • Installed molding under rear stateroom door frame and around shower
  • Put engine room door back on as well as forward engine access panel that has been out for months
  • Another coat of varnish on the cabinet doors (insides this time)

Sunday, June 16, 2013

Aft Head - Teak and Holly and Epoxy, Oh My !

We now have a working rear head with electric flushing head (toilet), new counter and Teak wood sink basin.  

We removed the artificial marble that was in the head for an old counter.  It was stained and not installed at the right angle and sadly after showering, the water would puddle on the countertop and not run off the front.
We pulled all of that out, repainted all of the walls with a porcelain paint to refresh all of the walls in the shower.  We also decided to make the counter out of Teak and Holly.  To do this we used 3/4" marine grade plywood with teak and holly veneer on it.  
After dry fitting the counter and vertical wall, we cut all of the holes we needed for the storage access, shower pump switch, sink drain, faucet and shower knob.  

Because this is also the shower, it was important that we consider how to avoid rot from the water.  To do this we decided to cover all of the wood in epoxy.   After mounting, we have used painters tape to protect the newly applied porcelain paint, and then did an initial coat of Epoxy.  After dry, we sanded with 220 grit sandpaper to get it very smooth.  The next step was to wipe it all down with a tack cloth and then apply another coat of epoxy.  I noticed in the first coat that by the time I was finishing up the work the epoxy was starting to get too thick to work well with.  

To combat this, I mixed smaller batches and focused on specific parts of the counter starting with the top because I wanted that to look the best of all of it.  I applied a fairly thick coat of epoxy with a chip brush on the wood, and then gently stroking in the direction of the grain to blend it all in and ensure any bubbles in the epoxy were popped.

I added the shower control and the sink faucet and then installed our favorite feature and that is the sink carved out of an actual teak log.  We bought the sink online and when installed it leaked around the drain.  We contacted the company and without much help from them other than an assurance that the movement and gaps in the drain would not be a problem (turned out it was), we did what most boat owners end up doing, we figured we could do it better.   We removed the old drain from the log, cleaned out the sealant that was used by the place we bought it from to seal the drain.  From there I carved the drain a bit deeper so that the flange of the drain actually sat lower than the lowest portion of the bottom of the sink.  I thickened some epoxy with sawdust to a peanut butter consistency and applied it in the newly carved drain seat.  After installing and letting it dry, this worked great and was no longer leaking.  I still need to anchor the sink to the counter (likely will use silicone to do that in the event I ever need to remove it I can) but will do that after the fact.

In the end, we loved how this turned out.  The epoxy coats are thick enough to protect the wood for many many years even when getting wet during showers.  The finish is so shiny that it is reflective.  In the top picture you can see the reflection of the outlets.  Now I may have to make an outlet cover out of some spare teak that I have and epoxy them so they look close to as nice as the counter.

When we finish all of the work such as hanging the mirror back up, finishing with the outlet covers and doors for the counter, I will post more pictures.

Monday, May 13, 2013

Plumbing Project Continued (Joining it all together)

In the last post we talked about the new plumbing project that we were undertaking but could only take that project so far until the engine room was ready to connect it all together.

Part of the work that was going on in the engine room (and in a different post detailing that project) was to install holding tanks for waste water.  To do this, the old floors and platforms that had some rot in them had to be replaced.  A new floor was built, frame for the tanks, tanks installed and a new subfloor on top of those was created providing a new platform to mount the batteries, pumps hot water, heater, etc.

Early on during this project we wanted to make sure we had a way to filter water for use in our boat.  We have seen other boats that would put a canister style filter in the galley on the main sink cold water supply to ensure drinking and cooking water is filtered.

We decided to to create a 2 stage filter that will filter all water whether it has come in from a dockside pressure line or water from either of our two water holding tanks on board.  (We store 115 gallons of potable water on board in 2 tanks)  Because there may be times that we take rain water into the tanks, we wanted to be sure that we can filter it completely.    The first stage filter is a 5 micron sediment filter and the second stage is a 2 micron carbon block filter.  This not only filters the water from impurities, but the carbon block will remove any bleach that we may add to the tanks to purify any suspect water we may take in.


With the engine room complete enough to get back in there, we have been able to put the fresh water pressure pump in, the hot water heater, and start to combine all of the water lines that are replacing all of the old PVC flexible hosing that was starting to break down.

The picture on the right shows a small shelf I installed to mount the new fresh water pump to.  This pump is a variable speed pump that eliminates the need for an accumulator tank.  Above the shelf there is a wooden plate mounted over the soundproofing material (1-1.5" thick soundproofing covers all walls in the engine room)  This wooden panel will be the place to mount the manifolds to distribute the lines to the different portions of the boat.

I was able to find these extendable diffuser connections.  Basically it looks like a tee with PEX connectors on 2 sides and the 3rd side fits into one of the other tees.  The more you push together the more connection points there are, and it would be real easy to add an additional port for a future expansion.

One of the things we liked about PEX was that all lines can be color coded making the designation between hot and cold obvious.  In the picture on the left, I had connected cold water supplies to both the Galley/Front Head and also the Rear Head.  On the left side the hot water connections are made to also go to the Galley/Front Head and also the Rear Head.

I started with these lines mainly because when we ran the pex, I had left quite a bit of extra in the engine room and it was rather cluttered with every one of those lines having an additional 4-5 feet of line in the way.  I knew I bought more than I needed so I was ok wasting a bit to make sure we had plenty in there until we knew exactly where we were mounting it all.

You can see a bit of the finished connection points in the photo to the right.

Before this project there were flexible hoses and hose clamps and tees all over the place and it looked like a real mess.  I am glad to see this organized like it is in the picture on the right. Now with that said, I can tell you that as I have been planning and imaging this project, I had envisioned all of these really straight lines all mounted flush right up along each bulkhead and corner.  That would have been great, but as it was I think we spent about $250 on tees and 90 degree connections.  If we had done this the way I envisioned we could have easily tripled that, so I am satisfied with this and it looks MUCH better than before.

I also started to remove the connections from the old hot water heater and noticed that it had a horrible oder in the water inside the tank.  It smelled like sulfur and we had noticed this prior to starting this project as well.  In the end, we decided that if we were going to look at replacing the hot water heater now was the time.  We considered an on-demand style but after doing the calculations quickly realized that even the smallest load required would be 20amps at 120 volts.  This would translate to no less than 2400 amp hours and more than I would be able to supply with the current inverter and I like the idea of being able to make hot water in a bind by running the engine for 10 minutes or so.  We have mounted the hot water heater and ran the cold and hot water lines to this location.  This model does come with the ability to circulate the engine coolant water through the hot water heater to generate hot water without electricity, but sadly the hot water lines from the engine won't reach this new location for the hot water heater so will need to be replaced with longer ones.


Saturday, April 20, 2013

New Plumbing Lines installed


It appears back in 1978 when the boat was built, some of the water lines that were run were 1/4 copper tubing. At some point in the past one of the previous owners replaced that copper plumbing with reinforced hose. The down side is that there had been many places where it was run in small runs and then joined together or sections replaced and joined to the old.

 The results were a spaghetti twined mess in most cases with plastic Tee's and hose clamps. In the engine room there were 3 or 4 Tee's as things were added over the years and it just appeared to be a bit unmanageable. While cleaning in the engine room we decided to scrub the hoses and as we did noticed they were "gummy" When doing some research what I found out is that the "gummy" feeling was the material starting to break down.

Under Galley
This was the birth of a new project. Run new water lines for all fresh/pressure water throughout the boat, clean up and organize the plumbing runs and add water filtration to not only filter what is stored in the tanks but also the standard city water input when at a Marina. We started by running new hot and cold water lines from the engine room to the galley. We welcomed this change because someone in the past ran the 2 Flexible hoses for water along the floor in the galley (Rather than under a floor or through a compartment).

 From the Galley, we ran the new lines forward under the sole to the forward port hanging locker. From there we chose a new route over the previous one by going from section to section up to the V-Berth, across the v-berth and back down the starboard side into the forward head under the sink. We also ran hot and cold lines from the engine room to the rear head as well. In the rear head we added tee's and cutoffs so we could feed hot and cold water to the sink as well as the shower. We also added a fresh cold water line extension to provide water to the rear head rather than pumping in from a through hull.

We chose to instal Pex lines rather than the flexible hosing that was in the boat before.  After doing some research and finding out that many new boats are being made with Pex, we decided to give it a try.  In every place where the lines go through a bulked we installed a PVC protective sleeve to protect the Pex from any wearing with movement.   We also supported all Pex with clips (as seen in the picture above as well).  Pex lines are now run to the Galley and both heads. We still have to bring it all together in the engine room and connect it to the hot water heater and filters.    Like most projects, we created a map of what we intended to install so that we can keep it for reference and with the boat documentation.  Below is the diagram of the fresh water plumbing.

Saturday, April 13, 2013

What happens during spare time on board

Deb and I have been working hard to get everything wrapped up on schedule for moving aboard in June.  We have a lot of projects that are all under way right now.  The rear head is being completely rebuilt (new counters, sink, support walls, toilet and plumbing).  The engine room is getting a make over as well.  Most all has been removed from the engine room short of the engine (all pumps, batteries, hot water heater, etc).  We are actually hiring someone to help with installing holding tanks, 36 gallons between 2 tanks.  As part of this process, they removed the upper floor in the engine room and will be building a new sub floor for the tanks, tank frames and a shelf 16" higher than the subfloor.   We are hoping that will be done sometime this week.   We have taken advantage of the open space in the engine room to install new plumbing and reframe the flooring where a generator will go at some point.   We pulled out the lower floor and are adding support studs to help reinforce it.  We have added new supports and also made new floor planks out of Red Oak.  We have drilled for countersunk screws.  It is epoxied to seal the wood and protect it from moisture.  Those will be going back on board tomorrow.

We have installed the new Teak cabinet faces on the Starboard side as well.  Today we cleaned the outside of the boat and scrubbed the windows in the cockpit.  As we were looking for routes and ways to run new plumbing lines for both hot and cold water to the forward head, we had the floor panels out over the fuel tank and around the mast.  While we didn't find a great path to pass the water lines, Deb did get distracted by the nastiness of the bilge.
She put on a pair of rubber gloves and pulled about 6 handfuls of what looked like mud.  As she scraped the floor in the forward bilge we realized that the previous owner had a problem with the forward shower drain pump and rather than fix it, he just yanked the drain line out and let the forward shower drain into the bilge.  So god only knows how many years of soap scum and nastiness has worked it's way down the shower drain and into the bilge.

I know we all want to think of anchoring off a white sand beach and chilling on deck with a coldie, but these are some of the other not so glorious sides of working and refitting a boat.  
.

Saturday, February 2, 2013

Stateroom Coming Together

About 3 months ago we started the Salon refit.  Early into the demolition we found that the Chain Plates were leaking and started to worry about their strength given they are 35 years old.  As you can read in an earlier post, we replaced them.  Once complete we slowed down through the holidays while traveling and are back at the work again.  

So far, we have removed the salon cabinets (behind the settee), Built new seat backs in the Salon, Built new countertops behind the settee's.  We removed the Atkins & Hoyle hatch that was leaking around the glass and sent it back to the manufacturer for rebuilding.  (I would recommend this to anyone that has Atkins and Hoyle hatches.  They are still in business and family owned.  A complete rebuild with new glass, gasket and overall tune up was 1/2 the price of a new hatch and matches all the others on the boat).  We build new Teak walls behind the Settee's as well as along the coachroof.  We painted all of the inner settee storage with a nice new coat of white paint.

Insulated the entire ceiling with 3/4" insulation and installed the Pine Slat ceiling like in the rest of the boat.  This went on the ceiling, including the angled section that goes on to the Galley.  We installed the new duct work and new register boots in the Salon in preparation for the new Reverse Cycle A/C Heating unit that we will install.  

The salon was wired first for LED accent lighting, fans, reading lights as well as surround sound speaker wires.  I know that I won't likely remember the locations of each of the wires so made a quick video to outline where they are run.


One of the challenges we had was that when we made the new counter tops, we had a need to get creative on how we wanted to protect and decorate the raw edge of it.  We wanted to install a fiddle rail, much like what is in the galley.  The down side is that I couldn't find any place where I could buy fiddle or bunk rail that was over 5' long and I didn't want to have a joint in the middle of the counter.  So, like we have found ourselves doing many times in the past, we had to figure out another way.  We purchased raw teak wood at 1/2" thickness.  After ripping it to 2 and a half inches wide, we routed a groove in the bottom, used a round-over bit to ensure that the top of the rail is round.  I think they look pretty good and will be installed shortly.  We ended up making 2 8 foot lengths of this fiddle rail and another 5 8 foot lengths of thin trim molding to go around the cabinet facing that we are building for the salon.

Sunday, December 2, 2012

LED Multi-Use Lighting for the Owners Stateroom

We have been considering putting accent lighting in the Owners Stateroom since we completed the refit there last year.  I ended up purchasing some LED light strips that were single color and waterproof at a local electronic component store to install in the boats breaker box.  I never did install them but it started the expansion of our ideas for the stateroom.

LED lighting is available at West Marine but it is very expensive and not as versatile as what you can order online.  I reviewed the specs for the LED strips from West, and the ones I can find on Amazon seemed to be fairly similar in that they were the bright LED style strips and waterproof, but the ones from Amazon were also able to be cut to any length and could be set to change colors if desired.

Link to Amazon RGB LED Lights

Thin Cedar Strips mounted
We chose Cedar as the mounting surface for the pleasant smell, resistance to moisture and lastly it was an inexpensive but good way to accomplish the task.  I bought a single 8 foot cedar fence picket and 3 8 foot lengths of scalloped moulding to put the LED's behind.  We got these from home depot.

We cut thin strips of the cedar wood and drilled thin pilot holes through it every 18 inches or so.  We then drilled a small countersink hole at each one so that when mounted to the walls, the screws would be flush.

These particular LED lights came with a 120V AC to 12V DC adapter included in the kit which allowed me to toss that and wire these directly into the boat's 12v DC system.  When we did the refit in the stateroom, we planned to add lights later so already had wiring into each of the 4 corners of the room.
LED's mounted to cedar strips

When installing these lights, we installed the small electronic component, and Infra Red Remote receiver into the corner of the stateroom (where later we will install a small shelving unit with power in it to charge cell phones and Ipad's and store eyeglasses when sleeping).

Once the wiring was connected to the connector for the LED's we mounted the LED strips to the cedar strips facing down.  These particular LED's come with a 3M adhesive backing but I don't suspect that will hold up in the varied temperatures on the boat.  We are adding some epoxy glue to the back side as well to ensure they stay put.

The scalloped molding was also cut to the proper length, had pilot holes drilled, as well as counter sinks allowing us to install and fill the screw holes with bungs after the fact.    Every time in the past we had installed anything that was wood on the boat, we have used a good hardwood (either Teak or Mahogany) but in this case we chose to use a simple pine molding and stain it to the color we wanted.
All my wiring tools
(meter, shrink wrap, marine crimps), etc

After staining the pieces, we applied multiple coats of varnish like the rest of our interior projects.  Once dry we installed these pieces of molding to the cedar strips with the top of the molding flush with the top of the cedar strip so that it creates a void aiming downward for the lights to shine down without being able to see them directly.

We are happy with the way the LED's have turned out and will also be doing something similar in the Salon as we wrap up that part of the refit as well.   The good news is that the entire strip of LED's in the stateroom (about 16 feet of them) still draws minimal amps and are better than the 2 double filament fixtures that were back there before we started the refit.  It is a pleasant surprise to turn on all of the boats LED lighting throughout and watching the DC Ammeter barely move.

Below is a short video we did showing what the lights look like in operation.  We filmed them with the lights changing colors but I don't see us using it that way, I suspect that we will just have a single color when they are on.


Sunday, September 23, 2012

NOT what you want to find in the middle of the job

The work on the Salon continues and we have removed the rest of all cabinetry.  2 opening ports have been removed as has one of the hatches in the roof that was leaking.

Removing the hatch took several hours to break the aluminum frame from the rise as well as breaking the riser loose from the actual deck.  Both had to be removed to inspect the core where the leak was.  We do have softened core in a small section along the opening, it is being removed and filled with a thickened epoxy.

The deck around the openings have all been cleaned and all silicone and adhesive removed.  Acetone worked well along with some 3M pads and razor blades for removing the material.

Image loading, if you are on a slow connection, please wait a momentAll of that was going according to plan, what was not going according to plan was noticing down below that water was slowly coming in along the forward port chainplate.  (The Chainplates are what attach to the hull and then the Standing Rigging, the wire that holds up the mast, is attached to).

After further inspection, I can see that at some point in time, this chain plate had some type of service done to it.  The wooden toe rail that the chainplate goes through, has been cut and then patched back in.  (Below in the image, the blue arrows point to the spot where the toe rail had been cut to gain access to the chainplate.  The red arrows point to the spot that the water is getting into.  I noticed when pouring just a couple of ounces of water on the deck in front of that patched part of the toe rail, some of it is running in.)   I could likely just run a bead of silicone along the joint between the toe rail and the deck, but I suspect that if this has been leaking for a while, I really want to see what is going on in there where that patch is.  This is one of the benefits of having the boat down to bear hull.  I would have never seen this otherwise and in the end, it is not a lot of water coming in, but a little bit every day would cause serious damage.  Now I know why I am having to replace the wooden countertop in the Salon, I suspected a leaking port, but I don't think that is the bigger problem here.
Image loading, if you are on a slow connection, please wait a moment
The strange thing is that it was not raining, this leak became evident just from the dew that was on the deck and starting to pool along the edge of the patched part of the toe rail.  Needless to say, I will be removing the patch and inspecting this closer.  This is a delay I certainly did not anticipate.

I am starting to see why I have heard that when starting a boat project, estimate the time line and the cost accurately and realistically, then double the cost and triple the time and you will be about right for the job.  That has certainly proven to be the case in most of our ventures so far.  :)  Ahhh boat ownership.    I joke, but really wouldn't trade it for the world.


Saturday, July 9, 2011

In the home stretch

We made a lot of mileage today and stayed at the Stingaree Marina in Crystal Beach TX.  We were able to slide in at low tide skimming the bottom to get into the slip.  We got electricity and filled up all water tanks which was nice.  Best of all was a restaurant and bar right on property. 
We had a nice dinner and went to sleep at a decent hour.  I feel asleep before Deb and she was dozing when she heard voices.  When she peeked out, there were a few people standing next to the boat on the finger peer checking it out after the bar closed.


We realized we didn't have a long trip the next day so we slept late (7am) and were out by 7:30am.  We passed one of the coolest Tugs we had seen on the whole trip.
OLD GLORY - Liked the logos and name of this one

We were in Galveston in just a few hours and then up the very busy Houston Ship Channel.  We encountered the largest ships we had on the whole trip here where the ships come out of Houston and down the Houston Ship Channel out to the Gulf of Mexico.  One cool thing is that the dolphins love to jump in the bow wake as they push all this water along.
Dolphin in Bow wake of a ship

Dolphin in Bow wake of a ship

We tried to stay just to the outside of the ship channel and decided to take a pit stop at RedFish island to check it out.  This will be one of our more common anchor out locations for a nice overnight or 3 day stay.  It is only a few hours away from our home port.
A couple of boats anchored at Red Fish island which has been rebuilt after being blown away in a hurricane


We sailed a bit, but there was very little wind to do so.  We always see the "BoardWalk Beast" which is a custom built speed boat that seats about 50 people.  It hauls but around the bay and gets everyone soaking wet.  It is always a bit of a cool site when she is pounding into the waves and those teeth are painted on the hull to look like a "bone in her teeth".
Bone in her Teeth - Boardwalk Beast


We motored past Kemah Boardwalk and into Clear Lake.  We skimmed along Watergate Marina realizing that it was recently dredged and pulled into our isle at Legend Point Marina.  We decided to back in to the slip and while we didn't do it quickly, we again made it look like we knew what we were doing with our new vessel (always a good feeling at the helm when people come up to the edge of the dock to help but then realize there is not much that they need to do).

We tied up and then enjoyed a long, long, long shower at home.

The trip is over, it was quite a bit of fun, and filled with adventure.  We really enjoyed it and are also glad it is over.  In retrospect we tried to compare this to our dream of cruising, and the one thing that was not like what we expect crusing to be is that we would get to enjoy a spot for some time.  We spent some time in some really cool anchorages and locations, and I would have really liked to stay in them for a few days or a week or so.  But that was not our goal on this trip, it was all about ensuring 50 miles per day to get home on time.

Our boat did well, in the end, we had an electrical issue and have some sail repairs to make, but I have been pretty impressed with our 35 year old engine that ran 12-14 hours per day for 13 days straight.  I was afraid to say that at any point during the trip but with the boat safely tied in the slip, I will verbalize how thrilled I am at that fact.
I also have a slight diesel leak to repair, and I think it is coming from the secondary 2 micron fuel filter but just didn't want to dig into that project yet.

Since returning, I have cleaned the bilge and I must say it was a disgusting brew down there.  I found 4 screwdrivers, 2 metal scrapers, an old bronze thru-hull fitting, a bunch of electrical tape and about 20 cut tie wraps.  It is cleaner, but not clean yet.  As soon as I can dig out all that old sludge crap, I will be painting the bilge with a new coat of white paint, but I figure I won't waste the time doing that until the bilge and engine is cleaned.  Sadly, this ole' Perkins leaks oil so I have to get a bit more creative than just a bilge sock down there, so I may make a removable tray that fits under the engine with wire wrapped oil absorbant pad, so the water in the bottom of the bilge is just water.

Friday, July 8, 2011

Way up there

This morning we traveled to Sabin channel this has been one of the deepest ones so far.   We passed through the Port Arthur lot of ship work going on watched a couple of guys climb around a large crane type barge doing some repair work.   


As we went under the bridge that was also have some construction done on it as well.    


Pleasure cove was the next area we came to this is the spot for the RV’ers they have a camp ground that was packed full.  It also has a large Coast guard pressense, we passed 3 boats coming in and parking lot full of boats on trailers.  Time to remove the magazines.


 After going under the Port Arthur Bridge we entered into the 62 mile run through both marsh and pastureland with oil pumps on both sides.  It has been reported that you can see alligators swimming or basking on the shores we did not see any.  They have gator holes and crawls set into the shore and banks.  We passed through Taylor Bayou outfall canal one of the anchorage’s we talked about staying at we have made such good time we reached here earlier morning.  When we came to the East bay canal it was very swallow and narrow, we had to wait behind a barge to let Eastbound empty barges go through.  The current and winds were blowing them around the captain said it was like a large sailboat.  The Sylvia barge which we had been following for many hours called and ahead to a couple barges coming eastbound that he was waiting on to see if it was safe for us to pass.  He told us to go ahead of him; the other barges said it was good to go.  This saved us hours of waiting.  The current was ok we were able to get through it.  There is dredging operations going on throughout this canal.   We arrived at Stingaree Marina at 7:30 got tied up filled the water and got settled for the night, there is a restaurant right at the marina so we went in and grabbed dinner.  Around 8:45 the Sylvia barge finally passed by.  I am so glad he let us go ahead of him!!  We headed back to the boat Gil charted our course for tomorrow looks like we are only about 32 miles from home!!