Showing posts with label Gulf. Show all posts

Sunday, August 18, 2013

Getting the most from your Provisions


As you likely know from reading this blog, we tend to blog about projects and things we are doing or refitting on the boat.  The thing is now that we have moved aboard, we don’ just work on it every waking hour (though at times it seems like it). 

This morning before the heat of the day, I was relaxing in the cockpit and decided to do some food preparation for the upcoming week.  Deb and I had made a roasted chicken for dinner earlier in the week.  We had wrapped it up and put it in the fridge.    While living in our house, we would have left it in the fridge and either heated up a bit or tossed it in the trash when it had been in there a “little too long”. 

Rather than do that, we decided to prep all of the chicken for use in other things this week. 
First I stripped all of the skin from the bird (there was still a whole bird short of one breast and one wing).  The next steps was to remove the chicken from the bones.  Breaking off each piece (Breast, thigh, wing, leg) I just pulled the chicken from the bones being careful not to get any of the cartridge from the joints.  Each piece of chicken was pulled into a small ¼” to ½” wide strip of meat.


 All of that went into a Ziploc baggie to be used late.  We can make chicken sandwiches, chicken soup, or even to be seasoned up and rolled into a tortilla for a quick lunch/dinner.   This would be a great meal to do quickly and easily while under way.

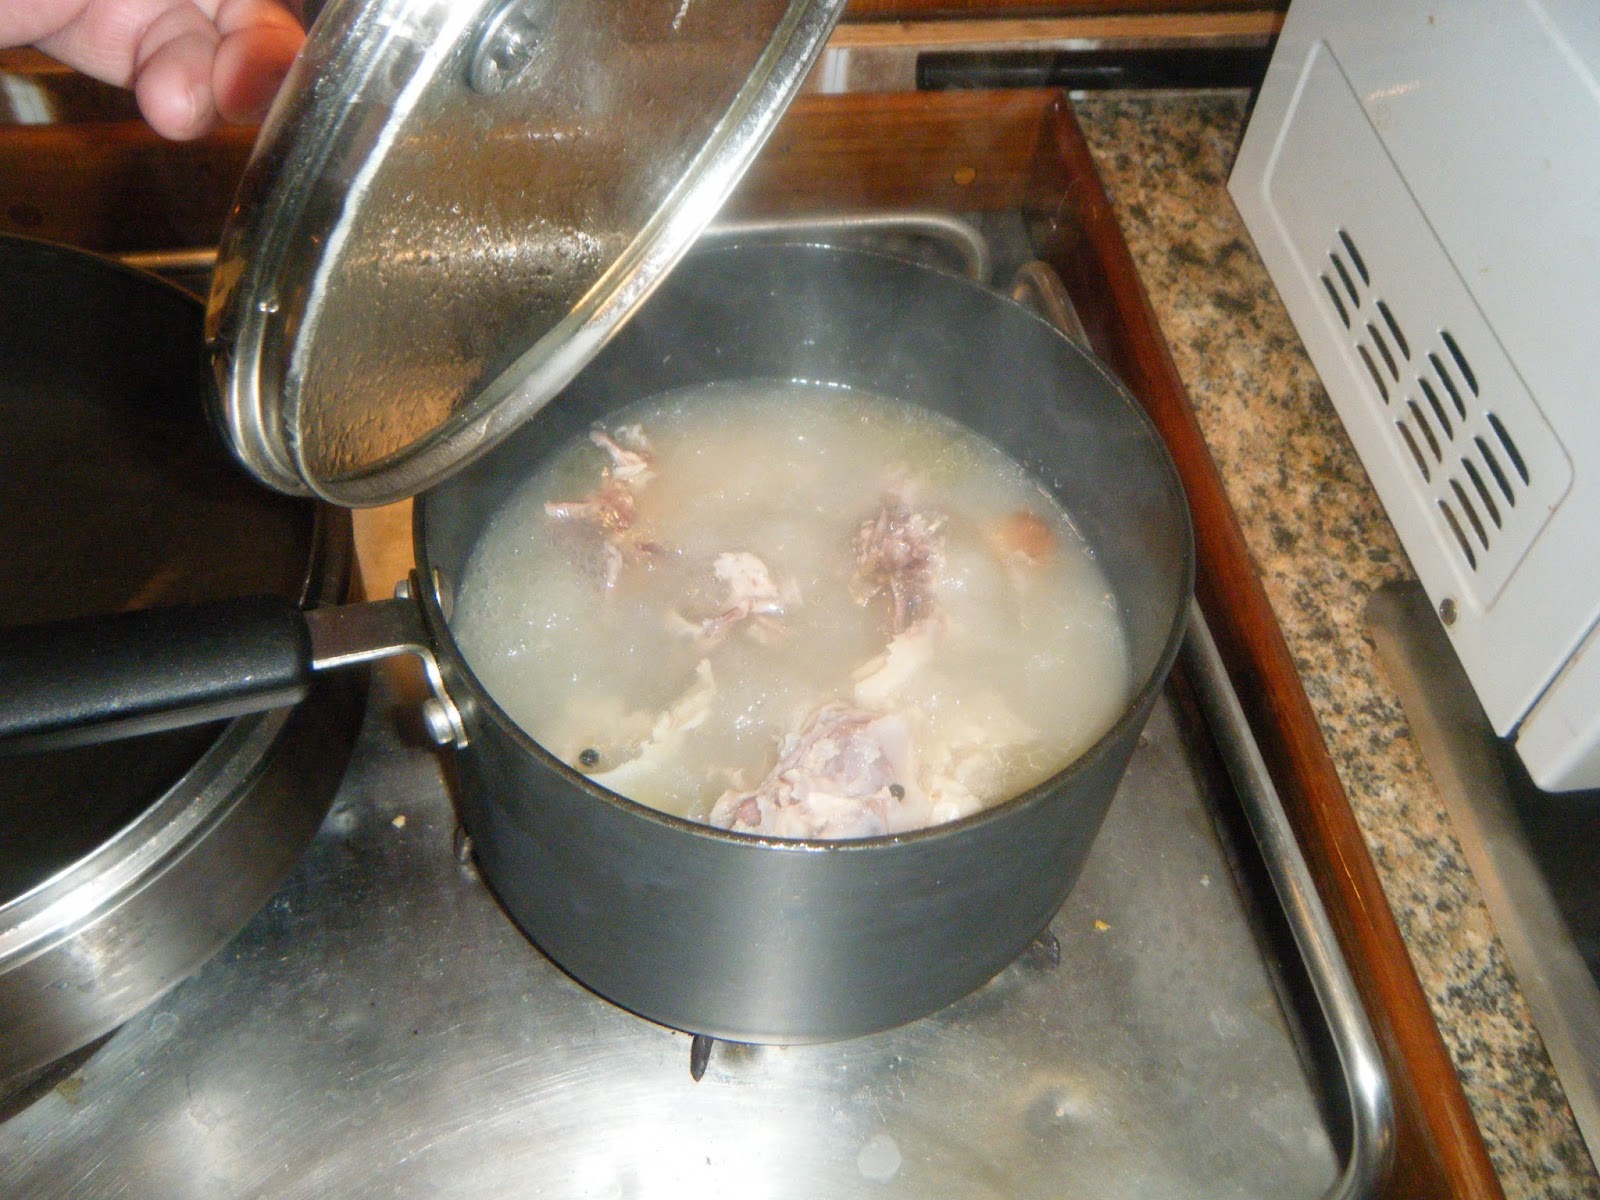
To make sure we get the most use out of this, we also broke the carcass into two parts and put it in a pot of water along with the chicken leg and thighbones.  We added, salt, pepper and just a bit of cayenne and heated it up on the stove.

 This will then be strained and cooled, when cool, we will scrape any fat off the top of the stock and put it in a sealed container to use as chicken stock in rice or soup later in the week.

I know this is a departure from our typical blog, but hope that over time these become more about what we are doing and where we are going than just what we are rebuilding J

Until next time, we will be enjoying our upcoming meals.

Bones simmering to make Chicken Stock


May the wind fill your sails, and your keel stay down.

Thursday, June 28, 2012

Using Git-Rot Penetrating Epoxy on a Bulkhead

As we were rebuilding the Navigation Station we noticed that there was a section of the bulkhead that had some dry rot in it.  I could push my finger against the veneered bulkhead and while the veneer in this section appeared solid, you could tell it was soft behind it.  After removing a little bit of the veneer we could actually push a finger into some sections of the plywood and it was soft.  (not so bad that it was just falling apart, but bad enough that I was really concerned).

I started to read about scarfing two pieces of wood together and then fiberglassing over them.  This seemed like a lot of work and would still be a "patch".  I considered removing the bulkhead and replacing it all together, however on this boat, the bulkhead is tabbed in under the subfloor, tabbed in along the hull as well as tabbed in on the roof.  This particular bulkhead goes up the port side, across the ceiling in a decorative rounded shape and down the starboard side.    I quickly deduced that this was beyond my expertise and would likely be upwards of $5K at a yard.    So I started to really do some reading on penetrating epoxy and it's use specifically on stringers on boats.  If this stuff was strong enough to form a new "foundation" in the form of stringers, it may really do wonders on this small section of the bulkhead.

So with instructions read, and the web researched, I picked up a bottle of Boat Life's Git-Rot at my local West Marine.  I did notice that there are other brands of penetrating epoxy and some are geared toward home repairs.  I am assuming that these are likely similar in concept but I stuck to the one made for marine applications in this case.  (I don't think it mattered, but don't know for sure).

The job started by refrigerating the whole package of Git-Rot because if you are not applying it in 50-70 degree weather the manufacture recommends cooling it overnight in the refrigerator.  I can assure you at the end of June in South Texas, even with the AC on in the boat, it was warmer than that.

We drilled a series of holes into the bulkhead at about a 20degree downward slope being careful not to drill all the way through the bulkhead.  This allowed the injection spots for the epoxy to go through all layers of the plywood where needed.  Once drilled the product was mixed and shaken for the very exact amount of time (60 seconds) and then slowly squirted into each hole.
I started at the bottom of the vertical area to be epoxied and would slowly fill until the epoxy started to come out of the hole.  I would then move to the next.  I did this through each hole (about 18 of them or so) and as soon as I was done with the 18, I would start over again.  The goal is to keep doing this until the wood won't absorb any more of the solution.
I did this with 3 squirt bottles (about 4 ounces each) on the first day.  I started to really see it penetrating the wood because as I would inject the epoxy in one hole, I would at times see it start to seep into the wood below or adjacent to it.  This was a great sign for me as it showed that it was really being absorbed into the wood like a sponge.

The next day, I came back and repeated the process and it took about another bottle and a half (about 4 ounces each).  At this time, no more was being absorbed into the wood.  After letting it dry overnight, I sanded the surface of the wood smooth where some of the epoxy had gotten on the surface of the wood.

The test was in the "knock"  Before I started I knocked on the bulkhead and when I got to the rotted section it went form a crisp knock sound to a thud.  After using Git-Rot, I could no longer stick my finger in the wood anywhere, there was no "give" on the veneer and the knock test sounded crisp all the way across the bulkhead even over the spots that previously responded with a thud.

I would call this process a success and was glad to have been done in a few days (between applying the product and then veneering over the surface where I drilled the holes) rather than attempting to tear out and replace that bulkhead.

As is the case, if we do a project and don't find information or some good step by step "how to" instructions, we have been recording the progress and then putting them together as a video in hopes that it helps others.  It should be known that I am not doing this because of any product sponsorship and I happened to Choose Boat Life's brand but there are others out there that would likely work the same way.  This is being posted in hopes that if you are attempting a project like this, you find it useful.  It also has the secondary benefit of helping my chronicle the work we are doing on our own boat.  Like most boats, it seems that with every repair, we find something else that we determine we should correct as well.

Saturday, July 9, 2011

In the home stretch

We made a lot of mileage today and stayed at the Stingaree Marina in Crystal Beach TX.  We were able to slide in at low tide skimming the bottom to get into the slip.  We got electricity and filled up all water tanks which was nice.  Best of all was a restaurant and bar right on property. 
We had a nice dinner and went to sleep at a decent hour.  I feel asleep before Deb and she was dozing when she heard voices.  When she peeked out, there were a few people standing next to the boat on the finger peer checking it out after the bar closed.


We realized we didn't have a long trip the next day so we slept late (7am) and were out by 7:30am.  We passed one of the coolest Tugs we had seen on the whole trip.
OLD GLORY - Liked the logos and name of this one

We were in Galveston in just a few hours and then up the very busy Houston Ship Channel.  We encountered the largest ships we had on the whole trip here where the ships come out of Houston and down the Houston Ship Channel out to the Gulf of Mexico.  One cool thing is that the dolphins love to jump in the bow wake as they push all this water along.
Dolphin in Bow wake of a ship

Dolphin in Bow wake of a ship

We tried to stay just to the outside of the ship channel and decided to take a pit stop at RedFish island to check it out.  This will be one of our more common anchor out locations for a nice overnight or 3 day stay.  It is only a few hours away from our home port.
A couple of boats anchored at Red Fish island which has been rebuilt after being blown away in a hurricane


We sailed a bit, but there was very little wind to do so.  We always see the "BoardWalk Beast" which is a custom built speed boat that seats about 50 people.  It hauls but around the bay and gets everyone soaking wet.  It is always a bit of a cool site when she is pounding into the waves and those teeth are painted on the hull to look like a "bone in her teeth".
Bone in her Teeth - Boardwalk Beast


We motored past Kemah Boardwalk and into Clear Lake.  We skimmed along Watergate Marina realizing that it was recently dredged and pulled into our isle at Legend Point Marina.  We decided to back in to the slip and while we didn't do it quickly, we again made it look like we knew what we were doing with our new vessel (always a good feeling at the helm when people come up to the edge of the dock to help but then realize there is not much that they need to do).

We tied up and then enjoyed a long, long, long shower at home.

The trip is over, it was quite a bit of fun, and filled with adventure.  We really enjoyed it and are also glad it is over.  In retrospect we tried to compare this to our dream of cruising, and the one thing that was not like what we expect crusing to be is that we would get to enjoy a spot for some time.  We spent some time in some really cool anchorages and locations, and I would have really liked to stay in them for a few days or a week or so.  But that was not our goal on this trip, it was all about ensuring 50 miles per day to get home on time.

Our boat did well, in the end, we had an electrical issue and have some sail repairs to make, but I have been pretty impressed with our 35 year old engine that ran 12-14 hours per day for 13 days straight.  I was afraid to say that at any point during the trip but with the boat safely tied in the slip, I will verbalize how thrilled I am at that fact.
I also have a slight diesel leak to repair, and I think it is coming from the secondary 2 micron fuel filter but just didn't want to dig into that project yet.

Since returning, I have cleaned the bilge and I must say it was a disgusting brew down there.  I found 4 screwdrivers, 2 metal scrapers, an old bronze thru-hull fitting, a bunch of electrical tape and about 20 cut tie wraps.  It is cleaner, but not clean yet.  As soon as I can dig out all that old sludge crap, I will be painting the bilge with a new coat of white paint, but I figure I won't waste the time doing that until the bilge and engine is cleaned.  Sadly, this ole' Perkins leaks oil so I have to get a bit more creative than just a bilge sock down there, so I may make a removable tray that fits under the engine with wire wrapped oil absorbant pad, so the water in the bottom of the bilge is just water.